मेनू
भाषा


Beginner to Intermediate: A 3-Month Training Plan

Hitting the three-year mark in tennis is a common inflection point. You have built a solid foundation, you understand the mechanics, and you are comfortable at the 2.5 to 3.0 level. But breaking through that plateau to become a solid 3.5 intermediate player requires shifting from just “hitting balls” to structured, intentional repetition.

That is exactly where your ball machine becomes your secret weapon. Instead of relying on a hitting partner’s inconsistent feeds, you can drill specific weaknesses until they become strengths.

Here is a structured, 3-month roadmap designed to elevate your game using your ball machine.

 
The Training Roadmap

This plan focuses on three distinct phases: building unbreakable consistency, developing directional control, and finally, mastering aggressive transition play.


Month 1: The Foundation of Consistency
Weeks 1-4

The biggest difference between a 3.0 and a 3.5 player is unforced errors. This month is about eliminating them by building a reliable rally ball.

  • Focus: Depth and net clearance.

  • Machine Setup: Medium speed, moderate topspin, feeding deep down the center.

  • The Drill: The “10-Ball Challenge.” Your goal is to hit 10 consecutive balls past the service line without missing. If you miss in the net or hit it short, start the count over. Do not move on to a new drill until you complete the challenge for both forehands and backhands.


Month 2: Directional Control & Movement
Weeks 5-8

Now that you can keep the ball deep, you need to be able to move your opponent around the court.

  • Focus: Hitting crosscourt and down the line while moving.

  • Machine Setup: Turn on horizontal oscillation (sweep) to feed balls randomly to your forehand and backhand sides.

  • The Drill: Place a target in the deep ad-court corner and the deep deuce-court corner. As the machine feeds randomly, practice hitting exclusively crosscourt for 50 balls, then exclusively down the line for 50 balls. Focus on your recovery steps back to the center mark after every shot.

 
Month 3: The Transition Game & Finishing
Weeks 9-12

Intermediate players win points by attacking short balls and finishing at the net. This month, we build your transition game.

  • Focus: Approach shots and volleys.

  • Machine Setup: Program a two-line feed: one short ball, followed immediately by a deep ball (or a passing shot).

  • The Drill: As soon as you recognize the short feed, move in aggressively, hit your approach shot deep, and follow it to the net. Split-step, and volley the second feed away. This builds the crucial habit of continuous forward momentum.

To help visualize how to distribute your weekly sessions and track your machine settings across this 12-week progression, here is an interactive scheduler:


Pro Tip: Do not just swing away. Film yourself from behind the baseline at least once a week. Watching the footage will reveal if you are truly getting low and stepping into the ball, or if you are getting lazy with your footwork as the hopper empties.


How to Stay Mentally Focused During Long Drills

The beauty of solo training is that you have complete control over your practice. With your ADIBO ball machine, you can hit more balls in an hour than you would in a week of regular match play. However, having a relentless feeding partner comes with a hidden challenge: “zombie mode.”

When you are staring down a hopper of 100+ balls, it is incredibly easy to check out mentally, drop your intensity, and just mindlessly swing at the ball. To get the most out of your machine and truly level up your game, you need to train your mind alongside your strokes.

Here are the best strategies for maintaining razor-sharp mental focus and intensity during long solo training sessions.

1. Break the Hopper Down into “Micro-Sets”

Staring at 150 balls and thinking, “I have to hit all of these,” is mentally exhausting. Instead of viewing the entire hopper as one giant task, break it down into smaller, purpose-driven blocks.

  • The 25-Ball Rule: Treat every 25 balls as a distinct set.

  • Give Each Set a Job: For the first 25 balls, focus exclusively on hitting deep crosscourt forehands. For the next 25, switch to down-the-line backhands. For the third set, practice alternating short and deep balls (like the approach shot drill).

  • Rest and Reset: Take a 30-second breather between these micro-sets. Step away from the baseline, take a deep breath, and actively tell yourself what the next objective is.

2. Set Up Physical Targets

If you aim at nothing, you will hit it every time. Hitting the ball randomly over the net reinforces bad habits and drains your focus.

Place physical targets on the other side of the court. You can use traffic cones, empty ball cans, or even a towel laid flat just inside the baseline. Giving your eyes a specific, colorful target to zero in on forces your brain to stay engaged. Count how many times you can hit the target (or land within a 3-foot radius of it) out of 10 balls. Trying to beat your own high score is a guaranteed way to keep your intensity high.

3. Focus on a Single Technical Cue

When you are still refining your foundational strokes, trying to fix your footwork, your backswing, and your follow-through all at once will cause cognitive overload.

Pick one specific technical element to focus on for a portion of the drill. For example:

  • “For the next 50 balls, I am only focusing on watching the ball physically hit my strings.”

  • “During this round, my only goal is to ensure a perfect, early split-step before the machine fires.”

  • “I am going to focus entirely on finishing my swing over my shoulder.”

When your mind starts to wander, gently pull it back to that single, simple cue.

4. Shadow a Real Opponent

One of the biggest traps of ball machine training is that you never have to read an opponent’s body language. To prevent your feet from getting lazy, visualize a player on the other side of the net.

  • Move to the center: After hitting a ball out wide, physically recover back to the center mark using side-shuffles, just like you would in a match.

  • Breathe and grunt: Exhale sharply or grunt on contact to force yourself to breathe rhythmically and maintain explosive energy.

5. Utilize the Machine’s Unpredictability

If you know exactly where the ball is going every single time, your brain goes on autopilot. To stay sharp, use the random oscillation features on your ADIBO machine.

Feature to UseWhy It Works
Horizontal SweepForces you to constantly react left or right, preventing you from planting your feet and getting lazy.
Random DepthMakes you read the trajectory of the ball instantly, training you to move forward to attack or backward to defend.
Varied SpinAlternating between heavy topspin and slice feeds forces you to constantly adjust your strike zone and racket face.

Training solo with a machine is a privilege, but it requires discipline. By gamifying your sessions, using targets, and breaking long runs into bite-sized sets, you will ensure that every single ball you hit translates to real, tangible improvement in your next match.


Mastering Your Transition Game: From the Baseline to the Net

If you want to elevate your tennis game to the next level, you cannot stay glued to the baseline forever. Sooner or later, you have to move forward, take the ball early, and finish the point at the net. This crucial phase of play is known as the transition game, and mastering it requires precision, confidence, and the right approach shot drills.

Transitioning from the baseline to the net can feel intimidating, but with targeted practice, it will become second nature. Below is a breakdown of how to train your transition game effectively using a ball machine.

The Ultimate Ball Machine Drill

One of the most effective ways to build confidence moving forward is to simulate real-match scenarios where you are forced to change your court position rapidly.

जाल: Program your machine for a short ball followed by a deep one to practice your approach shots.

This specific sequence is brilliant because it forces you to practice the two most critical movements in tennis: attacking the short ball and recovering for the next shot.

How to Execute the Drill

Here is how you can break down this specific approach shot drill step-by-step:

  • Step 1: Attack the Short Ball

    When the machine feeds the short ball, immediately recognize the depth and move forward aggressively. Keep your center of gravity low and hit your approach shot (either a biting backhand slice or a heavy topspin forehand) deep into the corners.

  • Step 2: Close the Net

    Do not stop moving after you hit the short ball. Follow the path of your shot and establish your position at the net, ideally around the service line, ready for a volley.

  • Step 3: React to the Deep Ball

    The machine will immediately feed a deep ball. This simulates a high-quality lob or a deep passing shot from your opponent. You must quickly recognize the trajectory, pivot, and backpedal to hit an overhead smash or a high-bouncing defensive groundstroke.

  • Step 4: Reset and Repeat

    Once you have handled the deep ball, quickly find your footing back at the baseline, ready for the next short ball feed.

Keys to a Successful Transition Game

To get the most out of this drill, keep the following technical elements in mind:

Focus AreaDescription
Early RecognitionThe transition game starts with your eyes. The split-second you realize a ball will land short, your forward movement must begin.
Continuous MomentumHit your approach shot के माध्यम से the ball. Your body weight should be moving forward toward the net as you make contact.
Split StepAs you close in on the net, remember to split step right as your imaginary opponent would be making contact with their passing shot.

The transition game is all about controlled aggression. By programming your ball machine to alternate between short and deep feeds, you train your legs and your brain to handle the dynamic, multi-directional movement required to dominate the court. Get out there, set up your machine, and start attacking the net!

Mastering the Cross-Court Smash: Why Angle is Everything

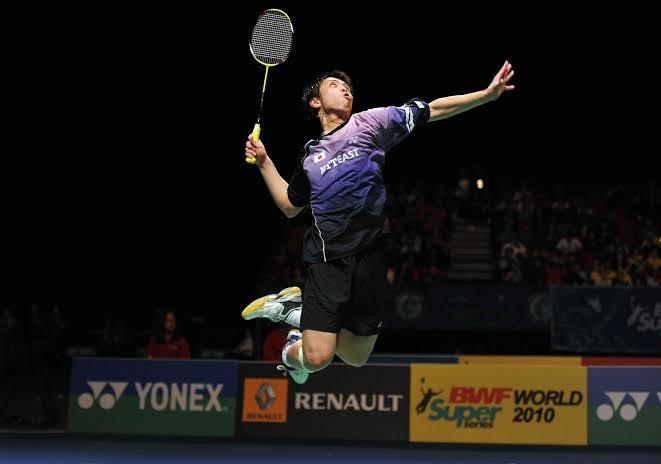
In badminton, the straight jump smash is the crowd-pleaser—it is loud, fast, and aggressive. But as you climb the ranks, opponents become highly adept at blocking straight attacks. To truly break down an elite defense, you must integrate the cross-court smash into your offensive strategy.

However, this shot is a double-edged sword. It travels a longer distance than a straight down-the-line smash, giving your opponent a fraction of a second more to react. If you don’t execute it with the correct angle, or if you fail to recover instantly, you leave the entire opposite side of your court wide open for a devastating counter-attack.


The Geometry of the Cross-Court Attack

When you hit cross-court, the shuttle must pass over the highest part of the net (the edges are naturally slightly higher than the center tape) and travel on a diagonal plane.

Because of this added distance, raw power will not guarantee a point. The secret is the angle of descent. A perfectly executed cross-court smash should land within the tramlines (the side alleys) and ideally in front of the mid-court line. If your smash lands too deep in the rear court, it loses its sting and simply becomes a fast clear, easily returned by your opponent.

Execution: Slicing for Steepness

To achieve that steep, unreachable angle, you cannot hit the shuttle perfectly flat. You need to employ a slight “slice.”

  • Body Positioning: Prepare just as you would for a standard straight smash to disguise your intention. Keep your shoulders turned side-on to the net.

  • The Point of Contact: Strike the shuttle slightly further out to your side than you would for a straight smash.

  • The Wrist Snap and Slice: As your racket makes contact, brush the strings slightly across the cork of the shuttle (cutting the shuttle). This slicing motion sacrifices a small amount of outright speed but imparts a heavy downward trajectory, causing the shuttle to dive sharply over the net and pull your opponent out of their defensive base.

Surviving the Counter-Attack: The Vulnerability Zone

The biggest risk of the cross-court smash is what happens immediately after you hit it.

When you swing across your body, your momentum naturally pulls you outward toward the sideline. If your opponent successfully blocks the smash straight down the line (the classic “straight block” defense), you are suddenly trapped on the wrong side of the court, staring at a massive open space.

To avoid this vulnerability:

  1. अपने शरीर के वजन से अधिक भार न उठाएं: संतुलित और चौड़े स्टांस में उतरने के लिए आपको हवा में पर्याप्त कोर कंट्रोल बनाए रखना होगा।

  2. प्रतिकर्षण: जैसे ही आपके पैर जमीन को छूते हैं, अपने बाहरी पैर का उपयोग करके तेजी से खुद को केंद्र रेखा की ओर वापस धकेलें।

  3. स्ट्रेट ब्लॉक की उम्मीद करें: उच्च श्रेणी के खिलाड़ी सीधे रिटर्न की उम्मीद में क्रॉस-कोर्ट शॉट लगाते हैं। प्रतिद्वंदी के शॉट लगाने से पहले ही आपका रैकेट ब्लॉक को रोकने के लिए ऊपर उठ जाना चाहिए।

शुरुआती लोगों के लिए हाथ-आँख समन्वय अभ्यास: शटल को चूकने से बचें

बैडमिंटन की शुरुआत में बेहद निराशाजनक अनुभव हो सकता है जब आपका दिमाग कहे "मारो" लेकिन आपका रैकेट सिर्फ हवा में ही लगे। शटलकॉक को हवा में उछालना या बार-बार रैकेट के फ्रेम से टकराना शुरुआती खिलाड़ियों के साथ होने वाली एक आम समस्या है। अच्छी खबर यह है कि यह पूरी तरह से सामान्य है, और इससे भी महत्वपूर्ण बात यह है कि इसे आसानी से ठीक किया जा सकता है।

समस्या शायद ही कभी आपके स्विंग में होती है; यह आपकी दृष्टि से लक्ष्य साधने में होती है। शटलकॉक हवा में उड़ते समय तेजी से धीमा होता है, जिससे टेनिस बॉल या बेसबॉल को ट्रैक करने के आदी किसी भी व्यक्ति का समय पूरी तरह से बिगड़ जाता है। यदि आप खोज रहे हैं बैडमिंटन के शुरुआती खिलाड़ियों के लिएसबसे पहला कदम है अपने हाथ-आँख के समन्वय में महारत हासिल करना।

यहां तीन सरल, अत्यंत प्रभावी तरीके दिए गए हैं समन्वय अभ्यास आप अपनी आंखों और हाथों को एक साथ काम करने के लिए प्रशिक्षित करने के लिए ये कर सकते हैं।

ड्रिल 1: शटल बाजीगरी (कीपी-उप्पीज़)

इससे पहले कि आप शटल को नेट के ऊपर से मारने की कोशिश करें, आपको यह समझना होगा कि स्ट्रिंग से टकराकर शटल उछलने पर कैसा महसूस होता है।

  • इसे कैसे करना है: अपने रैकेट को आराम से फोरहैंड ग्रिप से पकड़ें और उसे अपने सामने सपाट रखें। शटल को हवा में उछालें और उसे जमीन पर गिरने दिए बिना लगातार रैकेट के फेस पर उछालने की कोशिश करें।

  • फोकस: शटल के पंखों पर नहीं, बल्कि उसके कॉर्क (आधार) पर नज़र रखें। हर बार उसे सही जगह (बीच में) पर मारने की कोशिश करें।

  • प्रगति: जब आप फोरहैंड साइड से लगातार 50 शॉट लगा लें, तो बैकहैंड साइड पर आ जाएं। असली चुनौती के लिए, हर बाउंस पर फोरहैंड और बैकहैंड को बारी-बारी से इस्तेमाल करें।

अभ्यास 2: वॉल रैली

कोर्ट पर किसी साथी की आवश्यकता के बिना अपनी प्रतिक्रिया समय और ट्रैकिंग गति में सुधार करने का यह सबसे अच्छा तरीका है।

  • इसे कैसे करना है: किसी समतल, ठोस दीवार से लगभग 6 से 8 फीट की दूरी पर खड़े हो जाएं। शटल को दीवार पर मारें और लगातार रैली जारी रखने का प्रयास करें।

  • फोकस: दीवार शटल को कोर्ट के पिछले हिस्से से आने वाले मानव प्रतिद्वंद्वी की तुलना में दोगुनी तेज़ी से लौटाती है। इससे आपको अपना स्विंग छोटा करना पड़ता है, अपनी कलाई पर भरोसा करना पड़ता है और तेज़ गति से शटल पर नज़र रखनी पड़ती है।

  • प्रगति: शुरुआत में दीवार के ऊपरी हिस्से पर शॉट लगाने से आपको अधिक समय मिलेगा। जैसे-जैसे आपका तालमेल बेहतर होता जाए, दीवार के निचले हिस्से पर निशाना लगाएं ताकि आप तेज़ और सपाट शॉट लगा सकें।

अभ्यास 3: कैच-एंड-ड्रॉप

कभी-कभी शोरगुल शटल के उड़ान पथ पर नज़र रखने में बाधा उत्पन्न करता है। इसे अस्थायी रूप से हटाने से आपके मस्तिष्क को शटल के उड़ान पथ पर पूरी तरह से ध्यान केंद्रित करने में मदद मिल सकती है।

  • इसे कैसे करना है: अपने साथी को नेट के दूसरी तरफ खड़ा करें और उसे आपकी ओर ऊंची शटल मारने को कहें। शटल को वापस मारने के बजाय, अपना रैकेट ज़मीन पर ही रहने दें। शटल पर नज़र रखें और उसे अपने खाली हाथ से ठीक उसी जगह पकड़ने की कोशिश करें जहाँ आपके रैकेट का स्वीट स्पॉट होता है (ओवरहेड शॉट के लिए सिर के ऊपर, या लिफ्ट शॉट के लिए आपके सामने)।

  • फोकस: इससे आपको शटल के ठीक नीचे आने के लिए अपने पैरों को हिलाने के लिए मजबूर होना पड़ता है, जिससे बेतरतीब ढंग से पहुंचने और झूलने की आदत पूरी तरह से खत्म हो जाती है।

सिर के चारों ओर से शॉट लगाने में निपुणता: पीछे से बचाव के लिए आपका सर्वोत्कृष्ट हथियार

बैकहैंड का पिछला कोना कोर्ट का सबसे मुश्किल क्षेत्र माना जाता है। जब खिलाड़ी इस क्षेत्र में काफी अंदर तक चले जाते हैं, तो ज्यादातर खिलाड़ी सहज रूप से एक कमजोर, रक्षात्मक बैकहैंड क्लियर शॉट लगाते हैं जो व्यावहारिक रूप से प्रतिद्वंद्वी को जोरदार स्मैश लगाने का न्योता देता है। हालांकि, उन्नत बैडमिंटनहमले को रोकना तो बिल्कुल भी विकल्प नहीं है।

उसे दर्ज करें सिर के चारों ओर शॉटशुरुआती खिलाड़ियों को यह थोड़ा अटपटा लग सकता है—अपने ऊपरी शरीर को मोड़कर फोरहैंड स्विंग का उपयोग करते हुए बैकहैंड साइड पर शटल को मारना—लेकिन कोर्ट के सबसे अंदरूनी कोनों से आक्रामक दबाव बनाए रखने के लिए यह एक अत्यंत आवश्यक तकनीक है।


बैकहैंड की बजाय अराउंड-द-हेड शॉट क्यों चुनें?
  • बेहतरीन शक्ति और गति: फोरहैंड स्विंग में बैकहैंड की तुलना में स्वाभाविक रूप से कहीं अधिक शक्ति उत्पन्न होती है। सिर के चारों ओर झुककर और शटल को घुमाकर, आप एक तीक्ष्ण आक्रमणकारी क्लियर शॉट, एक तेज़ फ्लैट ड्राइव या एक अप्रत्याशित क्रॉस-कोर्ट ड्रॉप शॉट लगा सकते हैं।

  • पूर्ण धोखा: क्योंकि आप अपने मानक ओवरहेड फोरहैंड शॉट की तैयारी का उपयोग कर रहे हैं, इसलिए आपका प्रतिद्वंद्वी तुरंत यह नहीं बता सकता कि आप कौन सा शॉट खेलने वाले हैं।

  • त्वरित अदालती वसूली: पारंपरिक बैकहैंड शॉट खेलने के लिए आपको अपनी पीठ पूरी तरह से नेट की ओर मोड़नी पड़ती है। सिर के चारों ओर से शॉट खेलने से आप अपने कूल्हों को कोर्ट की ओर थोड़ा खुला रख सकते हैं, जिससे आप तेजी से वापस अपने केंद्रीय स्थान पर आ सकते हैं।

क्रियान्वयन को परिपूर्ण बनाना

इस अजीबोगरीब दिखने वाले लेकिन घातक शॉट में महारत हासिल करने के लिए, आपको गति के तीन महत्वपूर्ण चरणों पर ध्यान केंद्रित करने की आवश्यकता है:

  1. कैंची किक की फुटवर्क: आपको अपना शरीर प्राप्त करना होगा पीछे शटल पर हमला करें। अपने गैर-प्रमुख पैर को आगे रखते हुए तिरछे तरीके से बैकहैंड कॉर्नर की ओर लंज करें। शॉट मारने की तैयारी करते समय, हवा में तेजी से "कैंची किक" करें और घूर्णी शक्ति उत्पन्न करने के लिए अपने पैरों को गतिशील रूप से बदलते रहें।

  2. आर्क और रीच: अपनी पीठ को झुकाएं और अपने धड़ को अपने गैर-प्रमुख हाथ की ओर अधिक झुकाएं। रैकेट वाला हाथ आपके सिर के ऊपर तक पहुंचना चाहिए ताकि शटल को आपके गैर-प्रमुख कंधे के थोड़ा पीछे और ऊपर मारा जा सके।

  3. आगे की प्रक्रिया: क्योंकि आपका शरीर एक तरफ झुका हुआ है, इसलिए आपका फॉलो-थ्रू स्वाभाविक रूप से सीधे नीचे जाने के बजाय आपके शरीर के आर-पार समाप्त होगा। भारी स्विंग की गति को अपने प्रमुख पैर को आगे खींचने दें, जिससे आपकी रिकवरी तुरंत कोर्ट के केंद्र में वापस आ जाएगी।

मानसिक दृढ़ता: मैच के निर्णायक क्षण में दबाव में शांत रहना

निर्णायक सेट में स्कोर 20-20 है। आपकी सांसें फूल रही हैं, दर्शक धुंधले से दिख रहे हैं, और शटल एक घंटे पहले की तुलना में दस गुना भारी लग रही है। इस नाजुक मोड़ पर, शारीरिक क्षमता और तकनीकी कौशल पीछे छूट जाते हैं। अगले दो अंक जीतने वाला खिलाड़ी जरूरी नहीं कि सबसे तेज या सबसे मजबूत हो—बल्कि वह होगा जिसके पास बेहतर कौशल होगा। खेल मनोविज्ञान.

महारत हासिल करना बैडमिंटन का मानसिक खेल खेल किसी भी प्रतिस्पर्धी खिलाड़ी के लिए अंतिम चुनौती है। यदि आप लगातार करीबी मैच हार रहे हैं या दबाव में अप्रत्याशित गलतियाँ कर रहे हैं, तो यह समय है कि आप अपने दिमाग को भी उतनी ही मेहनत से प्रशिक्षित करें जितनी मेहनत से आप अपने फुटवर्क को प्रशिक्षित करते हैं।


'घुटन' की शारीरिक संरचना

"घबराहट" कमजोरी की निशानी नहीं है; यह किसी खतरे की आशंका के प्रति एक शारीरिक प्रतिक्रिया है। जब आप परिणाम पर ध्यान केंद्रित करते हैं—अगर मैं यह पॉइंट खो दूं तो क्या होगा?—आपका मस्तिष्क लड़ने या भागने की प्रतिक्रिया शुरू कर देता है।

आपकी हृदय गति अचानक बढ़ जाती है, जिससे आपके अंगों से रक्त का प्रवाह कम हो जाता है। इसके परिणामस्वरूप घुटन के विशिष्ट लक्षण दिखाई देते हैं:

  • “मौत की पकड़”: आप अपने रैकेट को बहुत कसकर पकड़ते हैं, जिससे गेंद को चकमा देने और सटीक कोण बनाने के लिए आवश्यक उंगलियों की सहज शक्ति नष्ट हो जाती है।

  • जल्दबाजी में किए गए कदम: घबराहट के कारण आप शटल का पता लगाने से पहले ही हिल जाते हैं, जिससे आपका स्प्लिट-स्टेप टाइमिंग बिगड़ जाता है।

  • उथली साँस लेना: ऑक्सीजन की कमी से निर्णय लेने की क्षमता कम हो जाती है और तुरंत थकान महसूस होने लगती है।

बैडमिंटन के मानसिक खेल में महारत हासिल करने की रणनीतियाँ

इन शारीरिक प्रतिक्रियाओं पर काबू पाने के लिए जानबूझकर मानसिक तैयारी की आवश्यकता होती है। यहाँ बताया गया है कि आप अपने तंत्रिका तंत्र को कैसे नियंत्रित कर सकते हैं और सबसे महत्वपूर्ण समय पर शांत रह सकते हैं:

1. परिणाम पर नहीं, प्रक्रिया पर ध्यान केंद्रित करें

मैच के निर्णायक क्षण में सबसे बड़ी गलती जीत (या हार) की कल्पना करना है। आप अंतिम स्कोर को नियंत्रित नहीं कर सकते; आप केवल अपनी अगली कार्रवाई को नियंत्रित कर सकते हैं। अपनी दुनिया को तात्कालिक कार्य तक सीमित कर लें। खुद से कहें, "उनके हाथ से शटल निकलते हुए देखो," या "पकड़ ढीली रखें।" केवल तकनीक पर ध्यान केंद्रित करके, आप अपने मस्तिष्क को एक उत्पादक कार्य देते हैं, जिससे चिंताजनक विचार दूर हो जाते हैं।

2. रीसेट रूटीन लागू करें

किसी भी कुशल पेशेवर खिलाड़ी को महत्वपूर्ण सर्व या रिटर्न से पहले देखें—वे हर बार बिल्कुल एक ही काम करते हैं। वे शटल को तीन बार उछाल सकते हैं, अपनी स्ट्रिंग को ठीक कर सकते हैं, या एक गहरी, सुनाई देने वाली साँस छोड़ सकते हैं। यह सूक्ष्म प्रक्रिया एक सहारे का काम करती है। यह आपके शरीर को संकेत देती है कि यह बस एक और पॉइंट है, उन हजारों पॉइंट्स के समान जो आपने अभ्यास में खेले हैं।

3. सामरिक श्वास

जब दबाव बढ़ता है, तो सांसें तेज और उथली हो जाती हैं। अभ्यास के बीच, एक सरल 4-4-4 लय का उपयोग करके जानबूझकर अपनी हृदय गति को धीमा करें: 4 सेकंड के लिए सांस लें, 4 सेकंड के लिए रोकें, 4 सेकंड के लिए सांस छोड़ें। यह आपके तंत्रिका तंत्र को शारीरिक रूप से शांत होने के लिए मजबूर करता है, जिससे आपकी उंगलियों और कलाई की सूक्ष्म गतिशीलता बहाल हो जाती है।

रणनीतिक स्थिति: कोर्ट पर प्रभुत्व स्थापित करने के लिए चारों कोनों पर सटीक प्रहार करना

किसी भी स्थानीय बैडमिंटन हॉल में कदम रखें, और आपको खिलाड़ियों की ज़ोरदार आवाज़ सुनाई देगी जो जीत हासिल करने के लिए ज़ोरदार शॉट लगा रहे हैं। यह सोचना आसान है कि केवल ताकत ही सबसे कारगर हथियार है। हालांकि, कुशल खिलाड़ी एक बुनियादी सच्चाई जानते हैं: अपने प्रतिद्वंदी को दौड़ाना, उसे सीधे हराने की कोशिश करने से कहीं अधिक प्रभावी होता है।

आपके शस्त्रागार में सबसे विनाशकारी हथियार आपका प्रहार नहीं है - बल्कि आपका शटल प्लेसमेंट'फोर कॉर्नर्स' रणनीति में महारत हासिल करके, आप अपने प्रतिद्वंद्वी को व्यवस्थित रूप से थकाते हुए अपनी ऊर्जा बचा सकते हैं।

सटीक माप से कच्ची शक्ति पर विजय क्यों मिलती है?

सिर्फ ताकत पर निर्भर रहना जोखिम भरा और थकाने वाला खेल है। लगातार जंप स्मैश मारने से आपकी स्टेमिना जल्दी खत्म हो जाती है और अक्सर अनचाही गलतियाँ हो जाती हैं। इसके अलावा, अच्छे डिफेंस वाले खिलाड़ी के खिलाफ, अनुमानित स्मैश को आसानी से लौटा दिया जाता है।

बेहतर बैडमिंटन की रणनीति खेल कोर्ट पर नियंत्रण पर केंद्रित होता है। जब आप ताकत के बजाय सही जगह पर शॉट लगाने को प्राथमिकता देते हैं, तो आप रैली की गति को नियंत्रित करते हैं। आप अपने प्रतिद्वंदी को असहज और झुकने वाली स्थितियों में धकेल देते हैं, जिससे उनकी वापसी में देरी होती है और नेट के दूसरी तरफ उनके लिए पर्याप्त खाली जगह बन जाती है, जहां से वे आसानी से अंतिम शॉट लगा सकते हैं।

'फोर कॉर्नर्स' रणनीति को समझना

'फोर कॉर्नर्स' रणनीति बिल्कुल वैसी ही है जैसा कि इसके नाम से पता चलता है: शटल को लगातार अपने प्रतिद्वंदी के कोर्ट के चारों चरम कोनों (डीप फोरहैंड, डीप बैकहैंड, फ्रंट नेट फोरहैंड और फ्रंट नेट बैकहैंड) की ओर निर्देशित करना।

लक्ष्य यह है कि अपने प्रतिद्वंदी को यथासंभव लंबी दूरी तय करने के लिए मजबूर किया जाए। खिलाड़ी को अगल-बगल ले जाना प्रभावी होता है, लेकिन उन्हें लगातार आगे-पीछे ले जाना अधिक कारगर होता है। विकर्णउदाहरण के लिए, डीप बैकहैंड कॉर्नर से फ्रंट फोरहैंड नेट तक—यह उन्हें अधिकतम दूरी तय करने के लिए मजबूर करता है, जिससे उनका संतुलन बिगड़ जाता है और उनके फुटवर्क की लय बिगड़ जाती है।

रणनीति को कैसे क्रियान्वित किया जाए

इसे अपने खेल में लागू करने के लिए, आपको सोच-समझकर शॉट लगाने होंगे:

  • डीप रियर पर हमला करें: अपने प्रतिद्वंदी को बैकलाइन पर धकेलने के लिए ऊंचे, आक्रामक क्लियर शॉट और तेज़ फ्लैट पुश का इस्तेमाल करें। डीप बैकहैंड को निशाना बनाना विशेष रूप से प्रभावी होता है, जैसा कि हमने रियर-कोर्ट रिकवरी पर अपनी गाइड में चर्चा की थी।

  • फ्रंट नेट का फायदा उठाएं: एक बार जब वे पीछे की ओर धकेल दिए जाएं, तो उन्हें हताशा में आगे की ओर दौड़ने के लिए मजबूर करने के लिए टाइट ड्रॉप शॉट्स और स्पिनिंग नेट शॉट्स का उपयोग करें।

  • अप्रत्याशित बनो: फोर कॉर्नर्स की प्रभावशीलता धोखे पर निर्भर करती है। यदि आप दाहिने पिछले कोने पर शॉट मारते हैं, तो आपका प्रतिद्वंद्वी स्वाभाविक रूप से आगे बाएं कोने पर शॉट की उम्मीद करेगा। कभी-कभी एक ही कोने पर लगातार दो बार शॉट मारकर उन्हें गलत दिशा में अपना वजन बदलते हुए पकड़ लें।

बैडमिंटन में होने वाली आम चोटों से बचाव: अपने टखनों और घुटनों की सुरक्षा

बैडमिंटन एक बेहद तेज़ गति वाला खेल है जिसमें ज़ोरदार छलांगें, अचानक रुकना और बार-बार गहरे लंग्स करना शामिल है। हालांकि इस तरह की तीव्र गति इस खेल को बेहद रोमांचक बनाती है, लेकिन यह आपके निचले शरीर पर बहुत अधिक दबाव भी डालती है। अगर आप लंबे समय तक कोर्ट पर बने रहना चाहते हैं और चोट के कारण खेल से बाहर होने से बचना चाहते हैं, तो जोड़ों के स्वास्थ्य को प्राथमिकता देना बेहद ज़रूरी है।

किसी भी खिलाड़ी के लिए सबसे कमजोर दो अंग टखने और घुटने होते हैं। सौभाग्य से, सही दृष्टिकोण अपनाने से इन समस्याओं से बचा जा सकता है। खेल सुरक्षाइससे सामान्य मोच और खिंचाव के जोखिम को काफी हद तक कम किया जा सकता है।

टखनों और घुटनों का ही क्यों?

बैडमिंटन में अधिकांश गतिविधियों के लिए दिशा में अचानक परिवर्तन और भारी झटके सहने की आवश्यकता होती है।

  • एड़ियों पार्श्व बदलाव के दौरान या जंप स्मैश के बाद असंतुलित होकर उतरने पर उन्हें लुढ़कने या मोच आने की संभावना बहुत अधिक होती है।

  • घुटनों आगे की ओर गहरे लंग्स (विशेषकर नेट पर) के दौरान और विस्फोटक फुटवर्क के बार-बार होने वाले प्रभाव का सबसे अधिक भार शरीर पर पड़ता है, जिससे अक्सर पटेला टेंडोनाइटिस (जम्पर नी) या लिगामेंट में खिंचाव हो जाता है।

असरदार बैडमिंटन में चोट से बचाव इसके लिए लक्षित वार्म-अप, मांसपेशियों को मजबूत करने और उचित उपकरणों के सक्रिय संयोजन की आवश्यकता होती है।

खेल शुरू करने से पहले आवश्यक वार्म-अप

कभी भी बिना वार्म-अप किए कोर्ट में न उतरें। सही तरीके से किया गया डायनामिक वार्म-अप रक्त प्रवाह को बढ़ाता है, जोड़ों को चिकनाई देता है और मांसपेशियों को खेल की तीव्र मांगों के लिए तैयार करता है।

  1. जोड़ों का घूर्णन: गति की सीमा को बेहतर बनाने के लिए टखने और घुटने को धीरे-धीरे और नियंत्रित तरीके से गोल घुमाना शुरू करें।

  2. डायनामिक लंग्स: जांघों और नितंबों की मांसपेशियों को सक्रिय करने के लिए हल्के, उथले चलने वाले लंज करें। जैसे-जैसे मांसपेशियां गर्म होती जाएं, लंज की गहराई धीरे-धीरे बढ़ाएं।

  3. पैर हिलाना: पैरों को आगे-पीछे और अगल-बगल हिलाने से कूल्हों को खोलने और हैमस्ट्रिंग मांसपेशियों को ढीला करने में मदद मिलती है, जिससे घुटने के जोड़ों पर पड़ने वाला खिंचाव कम हो जाता है।

  4. छाया पदचिह्न: बैडमिंटन से संबंधित गतिविधियों के लिए अपने तंत्रिका तंत्र को तैयार करने के लिए 3-5 मिनट तक हल्के, धीमी गति वाले छायादार पैरों के अभ्यास (जैसे कि चेसे स्टेप) का अभ्यास करें।

चोट की रोकथाम के लिए सुदृढ़ीकरण

मजबूत मांसपेशियां आपके जोड़ों के लिए शॉक एब्जॉर्बर का काम करती हैं। अपनी साप्ताहिक दिनचर्या में कुछ सरल व्यायामों को शामिल करने से आपको तीव्र अभ्यास सत्रों को सहन करने के लिए आवश्यक संरचनात्मक मजबूती मिलेगी।

  • टखनों के लिए: पिंडली उठाने वाले व्यायाम (सीधे पैरों से और घुटने मोड़कर दोनों तरह से) अकिलीज़ टेंडन और टखने के जोड़ को सहारा देने वाली मांसपेशियों को मजबूत करते हैं। प्रतिरोध बैंड व्यायाम, जिसमें पैर को बाहर और अंदर की ओर धकेलने पर ध्यान केंद्रित किया जाता है, महत्वपूर्ण पार्श्व स्थिरता का निर्माण करता है।

  • घुटनों के लिए: स्क्वाट्स और बल्गेरियन स्प्लिट स्क्वाट्स क्वाड्रिसेप्स मांसपेशियों को मजबूत करने के लिए बेहतरीन हैं, जो घुटने की हड्डी को स्थिरता प्रदान करती हैं। हैमस्ट्रिंग कर्ल्स और ग्लूट ब्रिजेस यह सुनिश्चित करते हैं कि आपके पैर का पिछला हिस्सा इतना मजबूत हो कि डीप लंज के दौरान आपके शरीर की गति को कम कर सके।

खतरे के क्षेत्र से बाहर निकलना: डीप बैकहैंड कॉर्नर के बाद कैसे वापसी करें

डीप बैकहैंड कॉर्नर में फंस जाना बैडमिंटन में सबसे मुश्किल मूव माना जाता है। आप अपनी पूरी ताकत लगा देते हैं और आपकी गति आपको खेल से दूर ले जाती है। अक्सर, आप किसी तरह एक जोरदार क्लियर शॉट या ड्रॉप शॉट खेलने में कामयाब हो जाते हैं, लेकिन इससे पहले कि आप खुद को संभाल सकें, आपका प्रतिद्वंदी आपके द्वारा छोड़ी गई खाली जगह का फायदा उठा चुका होता है।

इस परिस्थिति में जीवित रहने का रहस्य केवल आपके द्वारा खेले गए शॉट में ही नहीं है, बल्कि आपके व्यवहार में भी है। अदालती वसूलीएडीबीओ में, हम जानते हैं कि कोर्ट पर प्रभुत्व हासिल करने की कुंजी है अपनी चाल पर महारत हासिल करना। तेजी से सेंटर में वापस आने और रैली में बने रहने के लिए, आपको 'शैसे' स्टेप को सीखना और उसमें निपुणता प्राप्त करना होगा।

डीप बैकहैंड शॉट इतना बुरा क्यों होता है?

जब आप बैकहैंड शॉट खेलने के लिए पीछे के कोने में गहराई तक जाते हैं, तो आपका गुरुत्वाकर्षण केंद्र बहुत बदल जाता है। यदि आप केवल नेट की ओर पीठ करके बीच में वापस दौड़ते हैं, तो शटल से आपका दृश्य संपर्क टूट जाता है, आपका संतुलन बिगड़ जाता है और आपकी प्रतिक्रिया में देरी हो जाती है।

असरदार बैडमिंटन फुटवर्क रिकवरी यही वह चीज़ है जो शौकिया खिलाड़ियों को कुलीन प्रतियोगियों से अलग करती है। आपको अपने प्रतिद्वंदी के रैकेट पर नज़र रखते हुए तेज़ी से अपनी मूल स्थिति में वापस आने में सक्षम होना चाहिए।

समाधान: शैसे स्टेप में महारत हासिल करना

चेसे स्टेप—जिसे अक्सर शफल या गैलप भी कहा जाता है—एक तेज़, फिसलने वाली गति है जिसमें एक पैर दूसरे पैर का पीछा करता है लेकिन कभी उसे पार नहीं करता। यह तकनीक पार्श्व और विकर्ण चाल के लिए सुनहरा नियम है। अदालती वसूलीयह आपको नेट के समानांतर अपने कंधों को रखते हुए अधिकतम दूरी तय करने की अनुमति देता है, जिससे यह सुनिश्चित होता है कि आप अगले शॉट पर तुरंत प्रतिक्रिया देने के लिए तैयार हैं।

इसे त्रुटिरहित तरीके से निष्पादित करने का तरीका यहाँ दिया गया है:

  • विस्फोटक धक्का-मुक्की: जैसे ही आपका रैकेट कोर्ट के गहरे कोने में शटल से संपर्क करे, अपने प्रमुख पैर (लंज फुट) का उपयोग करके अपने शरीर के वजन को तेजी से कोर्ट के केंद्र की ओर धकेलें।

  • चासे आंदोलन: तुरंत चेसे स्टेप शुरू करें। यदि आप दाएं हाथ से काम करते हैं, तो आपका बायां पैर हवा में ही तेजी से आपके दाएं पैर की ओर सरकेगा, जिससे दायां पैर केंद्र आधार की ओर और आगे "धक्का" देगा।

  • कम प्रोफ़ाइल बनाए रखें: पूरी प्रक्रिया के दौरान अपने घुटनों को थोड़ा झुका हुआ रखें। बहुत ज़्यादा उछलने से कीमती मिलीसेकंड बर्बाद होते हैं और आपका संतुलन बिगड़ जाता है।

  • चौड़े आधार वाली भूमि: चौड़े स्टांस के साथ स्प्लिट स्टेप में उतरकर मूवमेंट को पूरा करें। कम और चौड़ा गुरुत्वाकर्षण केंद्र अगले मूवमेंट के लिए आवश्यक स्प्रिंग जैसी ऊर्जा प्रदान करता है।

× WhatsApp