Menu
LANGUE


Beginner to Intermediate: A 3-Month Training Plan

Hitting the three-year mark in tennis is a common inflection point. You have built a solid foundation, you understand the mechanics, and you are comfortable at the 2.5 to 3.0 level. But breaking through that plateau to become a solid 3.5 intermediate player requires shifting from just “hitting balls” to structured, intentional repetition.

That is exactly where your ball machine becomes your secret weapon. Instead of relying on a hitting partner’s inconsistent feeds, you can drill specific weaknesses until they become strengths.

Here is a structured, 3-month roadmap designed to elevate your game using your ball machine.

 
The Training Roadmap

This plan focuses on three distinct phases: building unbreakable consistency, developing directional control, and finally, mastering aggressive transition play.


Month 1: The Foundation of Consistency
Weeks 1-4

The biggest difference between a 3.0 and a 3.5 player is unforced errors. This month is about eliminating them by building a reliable rally ball.

  • Focus: Depth and net clearance.

  • Machine Setup: Medium speed, moderate topspin, feeding deep down the center.

  • The Drill: The “10-Ball Challenge.” Your goal is to hit 10 consecutive balls past the service line without missing. If you miss in the net or hit it short, start the count over. Do not move on to a new drill until you complete the challenge for both forehands and backhands.


Month 2: Directional Control & Movement
Weeks 5-8

Now that you can keep the ball deep, you need to be able to move your opponent around the court.

  • Focus: Hitting crosscourt and down the line while moving.

  • Machine Setup: Turn on horizontal oscillation (sweep) to feed balls randomly to your forehand and backhand sides.

  • The Drill: Place a target in the deep ad-court corner and the deep deuce-court corner. As the machine feeds randomly, practice hitting exclusively crosscourt for 50 balls, then exclusively down the line for 50 balls. Focus on your recovery steps back to the center mark after every shot.

 
Month 3: The Transition Game & Finishing
Weeks 9-12

Intermediate players win points by attacking short balls and finishing at the net. This month, we build your transition game.

  • Focus: Approach shots and volleys.

  • Machine Setup: Program a two-line feed: one short ball, followed immediately by a deep ball (or a passing shot).

  • The Drill: As soon as you recognize the short feed, move in aggressively, hit your approach shot deep, and follow it to the net. Split-step, and volley the second feed away. This builds the crucial habit of continuous forward momentum.

To help visualize how to distribute your weekly sessions and track your machine settings across this 12-week progression, here is an interactive scheduler:


Pro Tip: Do not just swing away. Film yourself from behind the baseline at least once a week. Watching the footage will reveal if you are truly getting low and stepping into the ball, or if you are getting lazy with your footwork as the hopper empties.


How to Stay Mentally Focused During Long Drills

The beauty of solo training is that you have complete control over your practice. With your ADIBO ball machine, you can hit more balls in an hour than you would in a week of regular match play. However, having a relentless feeding partner comes with a hidden challenge: “zombie mode.”

When you are staring down a hopper of 100+ balls, it is incredibly easy to check out mentally, drop your intensity, and just mindlessly swing at the ball. To get the most out of your machine and truly level up your game, you need to train your mind alongside your strokes.

Here are the best strategies for maintaining razor-sharp mental focus and intensity during long solo training sessions.

1. Break the Hopper Down into “Micro-Sets”

Staring at 150 balls and thinking, “I have to hit all of these,” is mentally exhausting. Instead of viewing the entire hopper as one giant task, break it down into smaller, purpose-driven blocks.

  • The 25-Ball Rule: Treat every 25 balls as a distinct set.

  • Give Each Set a Job: For the first 25 balls, focus exclusively on hitting deep crosscourt forehands. For the next 25, switch to down-the-line backhands. For the third set, practice alternating short and deep balls (like the approach shot drill).

  • Rest and Reset: Take a 30-second breather between these micro-sets. Step away from the baseline, take a deep breath, and actively tell yourself what the next objective is.

2. Set Up Physical Targets

If you aim at nothing, you will hit it every time. Hitting the ball randomly over the net reinforces bad habits and drains your focus.

Place physical targets on the other side of the court. You can use traffic cones, empty ball cans, or even a towel laid flat just inside the baseline. Giving your eyes a specific, colorful target to zero in on forces your brain to stay engaged. Count how many times you can hit the target (or land within a 3-foot radius of it) out of 10 balls. Trying to beat your own high score is a guaranteed way to keep your intensity high.

3. Focus on a Single Technical Cue

When you are still refining your foundational strokes, trying to fix your footwork, your backswing, and your follow-through all at once will cause cognitive overload.

Pick one specific technical element to focus on for a portion of the drill. For example:

  • “For the next 50 balls, I am only focusing on watching the ball physically hit my strings.”

  • “During this round, my only goal is to ensure a perfect, early split-step before the machine fires.”

  • “I am going to focus entirely on finishing my swing over my shoulder.”

When your mind starts to wander, gently pull it back to that single, simple cue.

4. Shadow a Real Opponent

One of the biggest traps of ball machine training is that you never have to read an opponent’s body language. To prevent your feet from getting lazy, visualize a player on the other side of the net.

  • Move to the center: After hitting a ball out wide, physically recover back to the center mark using side-shuffles, just like you would in a match.

  • Breathe and grunt: Exhale sharply or grunt on contact to force yourself to breathe rhythmically and maintain explosive energy.

5. Utilize the Machine’s Unpredictability

If you know exactly where the ball is going every single time, your brain goes on autopilot. To stay sharp, use the random oscillation features on your ADIBO machine.

Feature to UseWhy It Works
Horizontal SweepForces you to constantly react left or right, preventing you from planting your feet and getting lazy.
Random DepthMakes you read the trajectory of the ball instantly, training you to move forward to attack or backward to defend.
Varied SpinAlternating between heavy topspin and slice feeds forces you to constantly adjust your strike zone and racket face.

Training solo with a machine is a privilege, but it requires discipline. By gamifying your sessions, using targets, and breaking long runs into bite-sized sets, you will ensure that every single ball you hit translates to real, tangible improvement in your next match.


Mastering Your Transition Game: From the Baseline to the Net

If you want to elevate your tennis game to the next level, you cannot stay glued to the baseline forever. Sooner or later, you have to move forward, take the ball early, and finish the point at the net. This crucial phase of play is known as the transition game, and mastering it requires precision, confidence, and the right approach shot drills.

Transitioning from the baseline to the net can feel intimidating, but with targeted practice, it will become second nature. Below is a breakdown of how to train your transition game effectively using a ball machine.

The Ultimate Ball Machine Drill

One of the most effective ways to build confidence moving forward is to simulate real-match scenarios where you are forced to change your court position rapidly.

The Setup: Program your machine for a short ball followed by a deep one to practice your approach shots.

This specific sequence is brilliant because it forces you to practice the two most critical movements in tennis: attacking the short ball and recovering for the next shot.

How to Execute the Drill

Here is how you can break down this specific approach shot drill step-by-step:

  • Step 1: Attack the Short Ball

    When the machine feeds the short ball, immediately recognize the depth and move forward aggressively. Keep your center of gravity low and hit your approach shot (either a biting backhand slice or a heavy topspin forehand) deep into the corners.

  • Step 2: Close the Net

    Do not stop moving after you hit the short ball. Follow the path of your shot and establish your position at the net, ideally around the service line, ready for a volley.

  • Step 3: React to the Deep Ball

    The machine will immediately feed a deep ball. This simulates a high-quality lob or a deep passing shot from your opponent. You must quickly recognize the trajectory, pivot, and backpedal to hit an overhead smash or a high-bouncing defensive groundstroke.

  • Step 4: Reset and Repeat

    Once you have handled the deep ball, quickly find your footing back at the baseline, ready for the next short ball feed.

Keys to a Successful Transition Game

To get the most out of this drill, keep the following technical elements in mind:

Focus AreaDescription
Early RecognitionThe transition game starts with your eyes. The split-second you realize a ball will land short, your forward movement must begin.
Continuous MomentumHit your approach shot through the ball. Your body weight should be moving forward toward the net as you make contact.
Split StepAs you close in on the net, remember to split step right as your imaginary opponent would be making contact with their passing shot.

The transition game is all about controlled aggression. By programming your ball machine to alternate between short and deep feeds, you train your legs and your brain to handle the dynamic, multi-directional movement required to dominate the court. Get out there, set up your machine, and start attacking the net!

Mastering the Cross-Court Smash: Why Angle is Everything

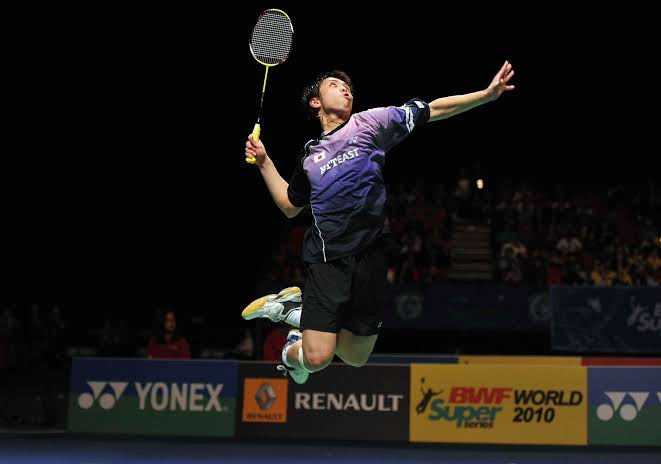
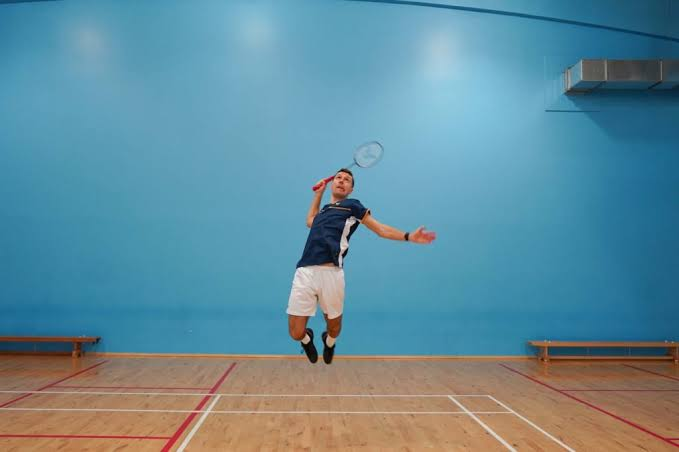
In badminton, the straight jump smash is the crowd-pleaser—it is loud, fast, and aggressive. But as you climb the ranks, opponents become highly adept at blocking straight attacks. To truly break down an elite defense, you must integrate the cross-court smash into your offensive strategy.

However, this shot is a double-edged sword. It travels a longer distance than a straight down-the-line smash, giving your opponent a fraction of a second more to react. If you don’t execute it with the correct angle, or if you fail to recover instantly, you leave the entire opposite side of your court wide open for a devastating counter-attack.


The Geometry of the Cross-Court Attack

When you hit cross-court, the shuttle must pass over the highest part of the net (the edges are naturally slightly higher than the center tape) and travel on a diagonal plane.

Because of this added distance, raw power will not guarantee a point. The secret is the angle of descent. A perfectly executed cross-court smash should land within the tramlines (the side alleys) and ideally in front of the mid-court line. If your smash lands too deep in the rear court, it loses its sting and simply becomes a fast clear, easily returned by your opponent.

Execution: Slicing for Steepness

To achieve that steep, unreachable angle, you cannot hit the shuttle perfectly flat. You need to employ a slight “slice.”

  • Body Positioning: Prepare just as you would for a standard straight smash to disguise your intention. Keep your shoulders turned side-on to the net.

  • The Point of Contact: Strike the shuttle slightly further out to your side than you would for a straight smash.

  • The Wrist Snap and Slice: As your racket makes contact, brush the strings slightly across the cork of the shuttle (cutting the shuttle). This slicing motion sacrifices a small amount of outright speed but imparts a heavy downward trajectory, causing the shuttle to dive sharply over the net and pull your opponent out of their defensive base.

Surviving the Counter-Attack: The Vulnerability Zone

The biggest risk of the cross-court smash is what happens immediately after you hit it.

When you swing across your body, your momentum naturally pulls you outward toward the sideline. If your opponent successfully blocks the smash straight down the line (the classic “straight block” defense), you are suddenly trapped on the wrong side of the court, staring at a massive open space.

To avoid this vulnerability:

  1. Do not over-commit your body weight: You must maintain enough core control in the air to land in a balanced, wide stance.

  2. The Recoil: The second your feet touch the floor, use your outside foot to explosively push yourself back toward the center line.

  3. Anticipate the Straight Block: Elite players hit cross-court expecting the straight return. Your racket should already be coming up to intercept the block before the opponent even makes contact.

Hand-Eye Coordination Drills for Beginners: Stop Missing the Shuttle

Starting out in badminton can be incredibly frustrating when your brain says “hit” but your racket hits nothing but air. Whiffing the shuttlecock or constantly hitting it with the frame is a universal beginner experience. The good news? It is entirely normal, and more importantly, it is easily fixable.

The issue is rarely your swing; it is your visual tracking. A shuttlecock decelerates rapidly as it flies through the air, completely throwing off the timing of anyone used to tracking a tennis ball or a baseball. If you are exploring badminton for beginners, mastering your hand-eye coordination is step one.

Here are three simple, highly effective coordination drills you can do to train your eyes and hands to work together.

Drill 1: Shuttle Juggling (Keepie-Uppies)

Before you try to hit a shuttle over the net, you need to understand how it feels to bounce it off your string bed.

  • How to do it: Hold your racket with a relaxed forehand grip flat in front of you. Toss a shuttle into the air and try to bounce it continuously on the racket face without letting it hit the ground.

  • The Focus: Keep your eyes locked on the cork (the base) of the shuttle, not the feathers. Try to hit it right in the sweet spot (the center) every time.

  • Progression: Once you can do 50 in a row on the forehand side, switch to the backhand side. For a real challenge, alternate forehand and backhand on every single bounce.

Drill 2: Wall Rallies

This is the absolute best way to improve your reaction time and tracking speed without needing a partner on the court.

  • How to do it: Stand about 6 to 8 feet away from a flat, solid wall. Hit the shuttle against the wall and try to keep a continuous rally going.

  • The Focus: The wall returns the shuttle twice as fast as a human opponent will from the back of the court. This forces you to shorten your swing, rely on your wrist, and track the shuttle at high speeds.

  • Progression: Start by hitting it high on the wall to give yourself more time. As your coordination improves, aim lower on the wall to simulate fast, flat drives.

Drill 3: The Catch-and-Drop

Sometimes the racket gets in the way of visual tracking. Removing it temporarily can help your brain focus entirely on the flight path of the shuttle.

  • How to do it: Have a partner stand across the net and hit high clears to you. Instead of hitting them back, leave your racket on the floor. Track the shuttle and try to catch it with your bare hand right where your racket’s sweet spot would normally be (high above your head for an overhead, or out in front of you for a lift).

  • The Focus: This forces you to move your feet to get perfectly underneath the shuttle, entirely eliminating the habit of reaching and swinging wildly.

Perfecting the Around-the-Head Shot: Your Ultimate Weapon for Rear-Court Defense

The backhand rear corner is notoriously the most difficult area of the court to defend. When pushed deep into this zone, most players instinctively resort to a weak, defensive backhand clear that practically invites their opponent to deliver a crushing smash. However, in advanced badminton, giving up the attack is simply not an option.

Enter the around-the-head shot. It might look a little awkward to beginners—contorting your upper body to strike a shuttle on your backhand side using a forehand swing—but it is an absolutely essential technique for maintaining offensive pressure from the deepest corners of the court.


Why Choose Around-the-Head Over a Backhand?
  • Superior Power and Pace: A forehand swing inherently generates significantly more power than a backhand. By leaning out and taking the shuttle around your head, you can hit a penetrating attacking clear, a fast flat drive, or a surprise cross-court drop.

  • Total Deception: Because you are utilizing your standard overhead forehand preparation, your opponent cannot instantly tell what shot you are going to play.

  • Rapid Court Recovery: Hitting a traditional backhand forces you to turn your back completely to the net. An around-the-head shot allows you to keep your hips partially open to the court, enabling a much faster recovery step back to your central base.

Perfecting the Execution

To master this awkward-looking but lethal shot, you need to focus on three critical phases of movement:

  1. The Scissor Kick Footwork: You must get your body behind the shuttle. Lunge diagonally into the deep backhand corner with your non-dominant foot leading. As you prepare to strike, execute a rapid “scissor kick” in the air, dynamically swapping your feet to generate rotational power.

  2. The Arch and Reach: Arch your back and tilt your torso heavily to your non-dominant side. Your racket arm must reach out and over your head to strike the shuttle slightly behind and above your non-dominant shoulder.

  3. The Follow-Through: Because your body is tilted to the side, your follow-through will naturally finish across your body rather than straight down. Allow the momentum of the heavy swing to pull your dominant foot forward, which immediately launches your recovery back to the center of the court.

Mental Toughness: Staying Calm Under Pressure at Match Point

The score is 20-20 in the deciding set. Your lungs are burning, the crowd is a blur, and the shuttle feels ten times heavier than it did an hour ago. At this critical juncture, physical stamina and technical skill take a back seat. The player who wins the next two points will not necessarily be the fastest or the strongest—it will be the player with superior sports psychology.

Mastering the badminton mental game is the final frontier for any competitive player. If you find yourself consistently losing tight matches or making uncharacteristic errors when the pressure is on, it is time to train your mind just as hard as you train your footwork.


The Anatomy of ‘Choking’

“Choking” is not a sign of weakness; it is a physiological response to a perceived threat. When you focus on the outcome—what happens if I lose this point?—your brain triggers a fight-or-flight response.

Your heart rate spikes, drawing blood away from your extremities. This results in the classic symptoms of choking:

  • The “Death Grip”: You squeeze your racket too tightly, destroying the relaxed finger-power needed for deception and sharp angles.

  • Rushed Footwork: Panic causes you to move before you have tracked the shuttle, destroying your split-step timing.

  • Shallow Breathing: Lack of oxygen leads to poor decision-making and immediate fatigue.

Strategies to Master the Badminton Mental Game

Overcoming these physical responses requires intentional mental conditioning. Here is how you can hijack your nervous system and stay icy cool when it matters most:

1. Focus on the Process, Not the Outcome

The biggest trap at match point is visualizing the win (or the loss). You cannot control the final score; you can only control your next action. Shrink your world down to the immediate task. Tell yourself, “Watch the shuttle out of their hand,” or “Keep a loose grip.” By focusing strictly on technique, you give your brain a productive task, pushing out anxious thoughts.

2. Implement a Reset Routine

Watch any elite professional before a crucial serve or return—they do the exact same thing every single time. They might bounce the shuttle three times, adjust their strings, or take one deep, audible exhale. This micro-routine acts as an anchor. It signals to your body that this is just another point, identical to the thousands you have played in practice.

3. Tactical Breathing

When pressure mounts, breathing becomes fast and shallow. Between rallies, intentionally slow your heart rate using a simple 4-4-4 rhythm: inhale for 4 seconds, hold for 4 seconds, exhale for 4 seconds. This physically forces your nervous system to calm down, restoring the fine motor skills in your fingers and wrists.

Tactical Placement: Hitting the ‘Four Corners’ to Dominate the Court

Step into any local badminton hall, and you will hear the thunderous sound of players trying to smash their way to victory. It is easy to fall into the trap of thinking that raw power is the ultimate weapon. However, elite players know a fundamental truth: making your opponent run is far more effective than trying to hit through them.

The most devastating weapon in your arsenal isn’t your smash—it is your shuttle placement. By mastering the ‘Four Corners’ strategy, you can conserve your energy while systematically exhausting your opponent.

Why Precision Beats Raw Power

Relying purely on power is a high-risk, high-fatigue game. Constant jump smashes burn through your stamina reserves and often lead to unforced errors. Furthermore, against a player with good defense, a predictable smash is easily returned.

Superior badminton tactics revolve around court control. When you prioritize placement over power, you dictate the flow of the rally. You force your opponent into awkward, lunging positions, delaying their recovery and creating massive open spaces on their side of the net for an easy finishing shot.

Understanding the ‘Four Corners’ Strategy

The ‘Four Corners’ strategy is exactly what it sounds like: consistently directing the shuttle to the four extreme corners of your opponent’s court (deep forehand, deep backhand, front net forehand, and front net backhand).

The goal is to force your opponent to travel the longest possible distances. Moving a player side-to-side is effective, but moving them on a diagonal—for example, from the deep backhand corner to the front forehand net—forces them to cover the maximum amount of ground, disrupting their balance and destroying their footwork rhythm.

How to Execute the Strategy

To implement this into your game, you need to mix your shots with intention:

  • Attack the Deep Rear: Use high, attacking clears and fast flat pushes to pin your opponent to the backline. Targeting the deep backhand is especially effective, as we discussed in our guide on rear-court recovery.

  • Exploit the Front Net: Once they are pinned to the back, use tight drop shots and spinning net shots to draw them into a desperate forward sprint.

  • Be Unpredictable: The effectiveness of the Four Corners relies on deception. If you hit to the back right corner, your opponent will naturally anticipate a shot to the front left. Occasionally hit to the same corner twice in a row to catch them shifting their weight in the wrong direction.

Preventing Common Badminton Injuries: Protecting Your Ankles and Knees

Badminton is a lightning-fast game characterized by explosive jumps, sudden stops, and deep, repetitive lunges. While this high-intensity movement makes the sport incredibly thrilling, it also places immense stress on your lower body. If you want to stay on the court longer and avoid being sidelined, prioritizing joint health is non-negotiable.

The two most vulnerable areas for any player are the ankles and the knees. Fortunately, with the right approach to sports safety, you can significantly reduce the risk of common sprains and strains.

Why the Ankles and Knees?

Most badminton movements require sudden changes of direction and heavy impact absorption.

  • Ankles are highly susceptible to rolling or spraining during lateral shifts or when landing off-balance after a jump smash.

  • Knees take the brunt of the force during deep forward lunges (especially at the net) and the repetitive impact of explosive footwork, often leading to patellar tendonitis (jumper’s knee) or ligament strains.

Effective badminton injury prevention requires a proactive combination of targeted warm-ups, muscle strengthening, and proper equipment.

Essential Warm-Ups Before You Play

Never step onto the court cold. A proper dynamic warm-up increases blood flow, lubricates your joints, and prepares your muscles for the explosive demands of the game.

  1. Joint Rotations: Start with slow, controlled ankle and knee circles to improve range of motion.

  2. Dynamic Lunges: Perform light, shallow walking lunges to wake up the quadriceps and glutes. Gradually deepen the lunge as your muscles warm up.

  3. Leg Swings: Forward-and-back and side-to-side leg swings help open up the hips and loosen the hamstrings, reducing the pull on your knee joints.

  4. Shadow Footwork: Spend 3-5 minutes doing light, slow-motion shadow footwork (like the chassé step) to prime your nervous system for badminton-specific movements.

Strengthening for Injury Prevention

Strong muscles act like shock absorbers for your joints. Incorporating a few simple exercises into your weekly routine will build the structural integrity needed to withstand intense rallies.

  • For the Ankles: Calf raises (both straight-legged and bent-knee) strengthen the muscles supporting the Achilles tendon and ankle joint. Resistance band work, focusing on pushing the foot outward and inward, builds vital lateral stability.

  • For the Knees: Squats and Bulgarian split squats are excellent for strengthening the quadriceps, which stabilize the kneecap. Hamstring curls and glute bridges ensure the back of your leg is strong enough to decelerate your body during a deep lunge.

Escaping the Danger Zone: How to Recover After a Deep Backhand Corner

Getting trapped in the deep backhand corner is widely considered the most difficult move in badminton. You are stretched to your absolute limit, and your momentum is carrying you away from the play. Often, you manage to hit a desperate clear or drop, but before you can reset, your opponent has already exploited the massive open space you left behind.

The secret to surviving this scenario isn’t just about the shot you play—it’s about your court recovery. At ADIBO, we know that mastering your movement is the ultimate key to dominating the court. To get back to the center fast and stay in the rally, you need to learn and perfect the ‘chassé’ step.

Why the Deep Backhand is a Nightmare

When you lunge deep into the rear backhand corner, your center of gravity shifts drastically. If you simply turn your back to the net and run back to the middle, you lose visual contact with the shuttle, throw off your balance, and delay your reaction time.

Effective badminton footwork recovery is what separates amateur players from elite competitors. You must be able to return to your base position quickly while keeping your eyes locked on your opponent’s racket.

The Solution: Mastering the Chassé Step

The chassé step—often referred to as a shuffle or gallop—is a rapid, gliding movement where one foot chases the other without ever crossing over. This technique is the golden rule for lateral and diagonal court recovery. It allows you to cover maximum ground while keeping your shoulders square to the net, ensuring you are instantly ready to react to the next shot.

Here is how to execute it flawlessly:

  • The Explosive Push-Off: The moment your racket makes contact with the shuttle in the deep corner, use your dominant foot (the lunge foot) to explosively push your body weight back toward the center of the court.

  • The Chassé Movement: Initiate the chassé step immediately. If you are right-handed, your left foot will slide quickly toward your right foot in mid-air, effectively “pushing” the right foot further out toward the center base.

  • Maintain a Low Profile: Keep your knees slightly bent during the entire sequence. Popping up too high wastes precious milliseconds and ruins your balance.

  • Land with a Wide Base: Finish the movement by landing in a split step with a wide stance. A low, wide center of gravity provides the spring-like tension needed to launch into your next movement.

× WhatsApp